Is your iMac slowing down? Do you find yourself spending a lot of time waiting for applications to complete what you want? If this is the case, you most likely have an excess of memory usage and need to install RAM to your iMac.

Random Access Memory (RAM) is an essential component in any computer system, influencing its overall performance. If you want to give your computer a rapid and cost-effective performance boost, boosting its RAM is a good choice. In this article, we’ll walk you through the stages of installing RAM in iMac, demystifying the procedure of how to install RAM, and empowering you to improve your computer’s performance.
Before You Begin “Identify iMac Model And Max Size Of RAM”
Before installing new RAM, find your iMac model using the release year or model number and size of your memory with the steps below:
- Launch the Apple menu.
- Select “About This iMac/Mac“.
- Look for the release year of your Mac.
- Also, check how much is the size of your iMac RAM and also check for the expandable memory it can support.
- Depending on whatever version of MacOS the system is running, there is a Memory tab where you can see how much RAM you have and how many slots it takes up.
Return to the main About This Mac screen and select the System Report option to bring up the model number. The hardware overview screen will appear. Go to the line containing the model identification.
Visit this Apple Support website to learn about the highest capacity of RAM your iMac can support. Most iMacs over the last eight years can support 32GB of RAM, with some going up to 128GB. The maximum storage capacity for a new iMac Pro is 512GB.
From Where To Buy iMac RAM
If you want to upgrade your computer’s RAM, there are a few things you should consider. To start, you need to find a reliable vendor where you can buy RAM. While there are various options available, I suggest you go for OWC and Crucial. Both sites offer competitive prices and can help you determine the appropriate type of RAM for your machine. It’s worth noting that Crucial contributed the RAM for this article.

One of the most important decisions you need to make is how much RAM to add. This will depend on how old your computer is and how you use it. For instance, my 2013 iMac came with 8GB of RAM (two 4GB sticks) and has four slots, two of which are filled. I could add two 8GB modules to the two vacant slots, which would give me a total of 16GB of RAM. Alternatively, I could remove the two 4GB RAM sticks that came with my iMac and install four 8GB RAM sticks for a total of 32GB, which is the maximum capacity supported by my iMac.
If you have an older iMac, adding RAM can significantly improve its performance, and it’s reasonably priced. For example, adding 16GB of RAM will cost you around $80.
When adding RAM, it’s best to do it in pairs. Consider adding two 8GB RAM modules instead of a single 16GB RAM module. This is because Intel provides dual-channel architecture, which is designed for memory pairs. While it’s unclear how much of a performance impact your computer would take if you only inserted one stick of RAM, adding RAM in pairs is more about performance than cost savings.
Also Read: How To Remove Activation Lock From Apple Watch
How To Install RAM In i MAC
1. Shut down your iMac and unplug all of its cables, including the power cable.
2. Arrange a few towels on the surface area. Make sure the towels are thick enough and broad enough to cover the 27-inch monitor.

3. Gently place the iMac face down on the towels to access the back. Ensure that you have enough working space.

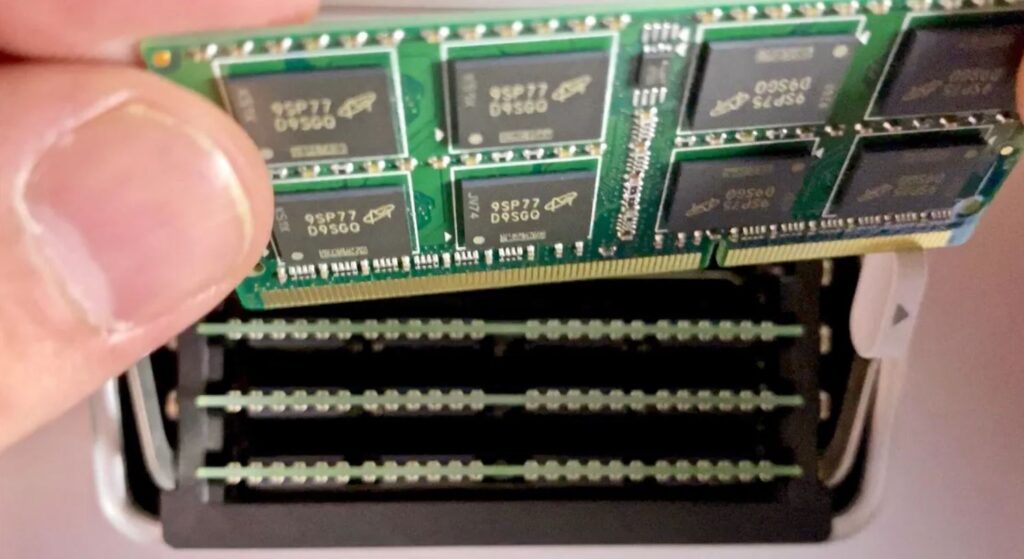
4. A button to eject the memory slot cover can be found beneath the power socket. To open the memory slot cover, firmly press this button with a blunt instrument (I usually use an ink pen with the pen portion hidden). Remove the memory slot cover to reveal four SO-DIMM slots.

5. Push the levers out to the iMac’s corners to open each SO-DIMM slot, then raise each module to remove it. IMPORTANT: Install two existing Apple RAM modules in slots 1 and 2, and two new OWC RAM modules in slots 3 and 4. Make sure you insert all new modules with the notch facing to the left. Push each module straight down into the slot, ensuring that it snaps into place. Double-check that the modules are properly inserted and that the levers are securely locked into position.


6. To reinstall the RAM door, simply press it into place. The RAM door is secured by friction, therefore you must press strongly to reinstall it.
7. Return your iMac to your working area, reconnect all wires, including the power cable, and switch it back on. Do not be frightened if you see a black screen for a few minutes, this means that the new memory is being initialized.
8. Once macOS returns to the desktop, navigate to → About This Mac → RAM. Verify that all installed RAM is properly accounted for and running at the appropriate speed.

Conclusion
Upgrading the RAM of your iMac is a cost-effective way to enhance its performance and make it more responsive. By following these straightforward steps, you can enjoy a smoother computing experience and extend the lifespan of your beloved iMac. Always refer to your iMac’s user manual or Apple’s official support resources for model-specific guidance and troubleshooting.
I wish you a happy upgrading process!
Read Also……